

Introduction
In apparel manufacturing, pattern making is the foundation of product accuracy. A single overlooked detail can trigger a chain reaction—misfit garments, production delays, excess sampling costs, and strained factory relationships. For B2B businesses managing tight timelines and margin-sensitive orders, these invisible costs quietly erode efficiency and profitability.
Consider this: a flawed sample may result in 2–3 days of delivery delay, an additional $80 in remake costs, and more importantly, a drop in team confidence. In high-frequency product cycles such as DTC brands, fast-turn fashion, or cross-border OEM orders, even small pattern mistakes can quickly scale into serious losses.
This article highlights 15 of the most commonly overlooked—but critical—details in pattern making, compiled from repeat issues observed across dozens of production runs. Each item comes with typical error patterns and actionable solutions to help technical teams, pattern makers, and operations leads mitigate preventable mistakes before they impact production.
The 15 Most Overlooked Pattern Making Details
A. Tech Pack & Communication Errors
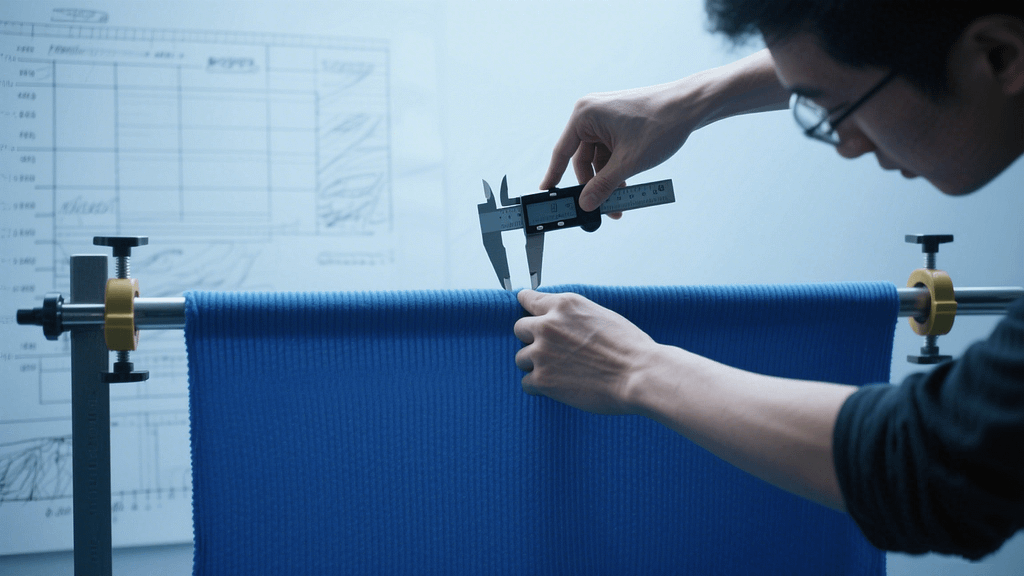
1. Missing Rib Stretch Ratio in Tech Pack
Typical Error:
The collar or cuff ends up too tight or too loose, affecting both comfort and aesthetics.
Why It Happens:
Designers often assume the factory understands standard stretch ratios based on material, but rib fabrics vary widely in elasticity. Without explicit values, factories default to guesswork.
Recommended Solution:
Measure the rib fabric’s elasticity and specify a stretch percentage or multiplier (e.g., 75% stretch = apply 0.75 length). Include this clearly in the Tech Pack with visual references or tables.
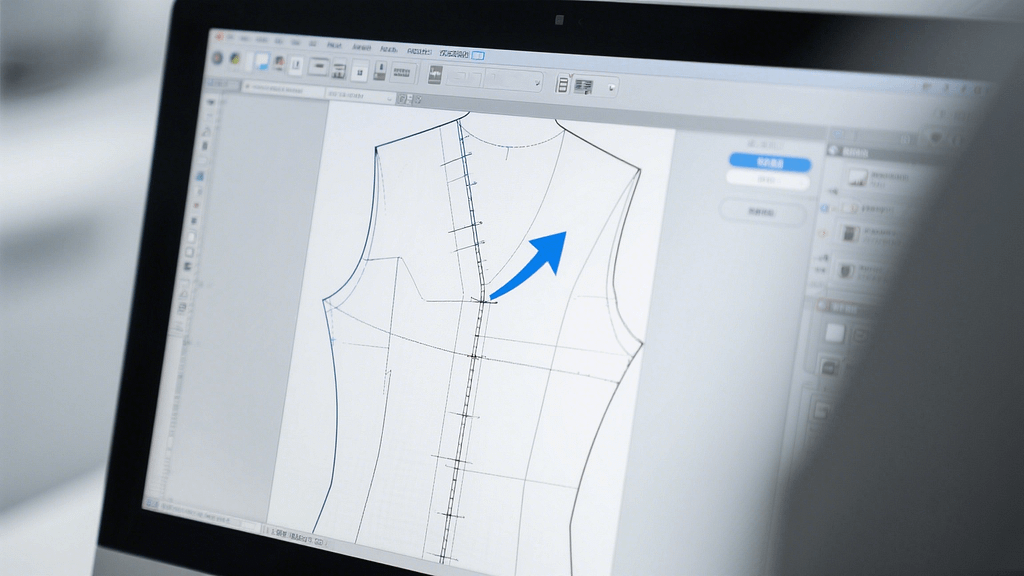
2. Unmarked Seam Allowance Directions
Typical Error:
Incorrect seam folding direction causes puckering or distorts the garment silhouette.
Why It Happens:
Seam direction isn’t always intuitively obvious, especially in complex constructions. Leaving this out forces the sewing team to make assumptions.
Recommended Solution:
Add seam direction arrows directly on the pattern or technical drawing. If using CAD, layer in sewing instructions or include them in annotations.
3. Outdated Pattern Versions Used
Typical Error:
A factory uses the wrong version of a pattern, resulting in inconsistencies or obsolete changes being reproduced.
Why It Happens:
Version control is often informal—pattern files get renamed manually or shared via unsynced channels.
Recommended Solution:
Use a consistent versioning format (e.g., V1.2, V1.3), include last modified date, and embed version info on the physical or digital pattern itself. Implement a central file repository for team access.
4. No Patternmaking Log for Iterations
Typical Error:
The same mistake reoccurs across rounds because no one remembers past feedback or decisions.
Why It Happens:
Oral communication or scattered emails lead to poor traceability in multi-round revisions.
Recommended Solution:
Create a standardized Pattern Log template to record every version, key fit notes, and revision actions. Share it with relevant team members—especially sample makers and tech designers.
5. Overreliance on Digital Drafting Tools
Typical Error:
Digitally perfect patterns fail in real-world sewing or fit testing due to paper-to-fabric inconsistencies.
Why It Happens:
Digital drafting tools provide theoretical accuracy but ignore fabric behavior, bulk at seams, or tolerance during stitching.
Recommended Solution:
Print and overlay patterns for physical check, and perform a test sew on sample fabric before production. Always verify key match points physically, especially for asymmetrical or multi-piece styles.
B. Fit and Body Mapping Issues
6. Darts or Seam Placement Not Validated on Actual Body Type
Typical Error:
Garment puckers, bulges, or forms unnatural folds when worn.
Why It Happens:
Dart positions or princess seams are drafted based on generic measurements without testing on target body types or fitting models.
Recommended Solution:
Always conduct a physical fitting session with a model who matches your size spec. Adjust dart intake and placement based on actual body curvature and garment tension points.
7. No Shrinkage Adjustment for Neckline
Typical Error:
After washing, the neck opening becomes uncomfortably tight or misaligned.
Why It Happens:
Fabric shrinkage is accounted for in main body panels but often forgotten in smaller zones like the neckline or binding.
Recommended Solution:
Apply shrinkage testing across all garment zones. Compensate the neckline pattern to match post-wash dimensions—especially important for cotton and rib-knit collars.

8. Chest to Neck Ratio Misbalanced
Typical Error:
The garment lacks chest support or shows distortion around the neck and collarbone.
Why It Happens:
Designers focus on chest measurements but ignore the relational tension between bust, shoulders, and neck area, leading to poor drape or pull lines.
Recommended Solution:
Use a general guideline of a 3:1 chest-to-neck ratio for most body types. Test for balance by hanging the garment and checking for natural vertical grain alignment.
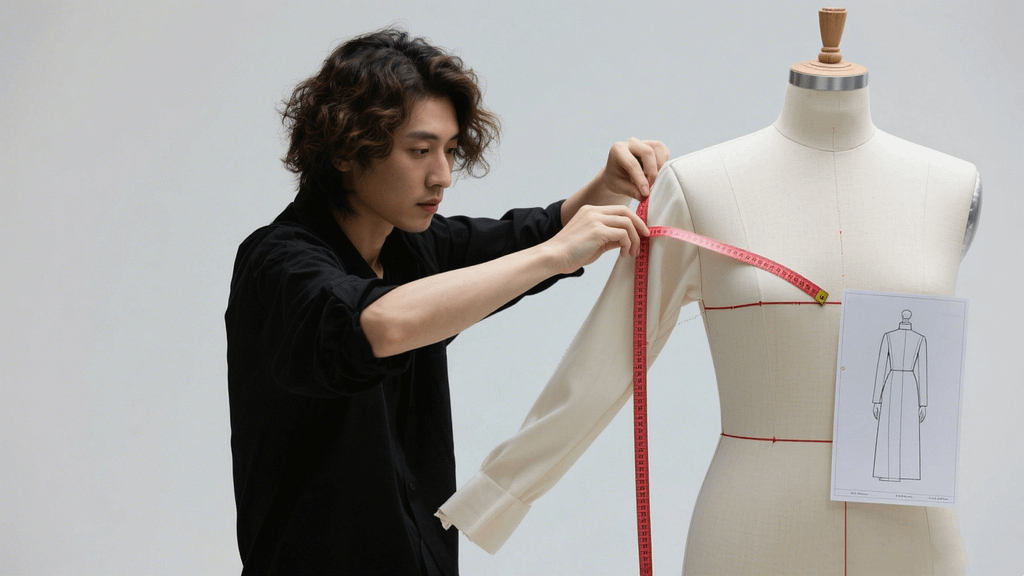
9. Armhole Size Not Evaluated for Range of Motion
Typical Error:
Wearers experience tightness under the arm or across the shoulder during normal activity.
Why It Happens:
Patterns are drafted to a static pose and rarely tested in dynamic conditions like lifting arms or bending.
Recommended Solution:
Conduct movement testing during fit sessions—especially arm raises, cross-body stretches, and overhead lifts. Modify the armhole curve and sleeve cap height accordingly.
C. Material Behavior Misjudgments
10. No Washed Sample Fitting Done
Typical Error:
Garments that fit correctly before washing become tight, short, or misshapen afterward.
Why It Happens:
Fabric shrinkage is tested in isolation, but the final garment isn’t re-evaluated after laundering, missing how shrinkage affects full construction.
Recommended Solution:
Fit test the garment after laundering (based on real customer care instructions). Use this feedback to adjust shrinkage allowances in the pattern before proceeding to bulk production.

11. No Real-Life Validation of Zipper Length
Typical Error:
Zipper gets stuck, causes puckering, or distorts garment shape when closed.
Why It Happens:
Zippers are selected based on spec sheet length but not tested in motion, especially in curved placements or tight openings.
Recommended Solution:
Install the zipper on a sample and perform real-use testing (e.g., zipping while worn, pulling across curved seams). Adjust zipper length or placement as needed to avoid stress points.
12. Woven and Knit Panel Mixing Without Compensation
Typical Error:
Seams pucker, twist, or misalign due to differing fabric behaviors.
Why It Happens:
The designer overlooks the stretch differential between woven and knit fabrics, assuming the pattern will adapt universally.
Recommended Solution:
Add compensation curves or seam ease where a knit meets a woven. Consider stabilizing or reinforcing knit sections to limit distortion and support uniform construction.

13. No Evaluation of Sewability in Corner or Edge Zones
Typical Error:
Sewing lines veer off, layers shift, or machines skip stitches at thick junctions.
Why It Happens:
Designs may include multiple folds, interfacing, or seam overlap in corners, which aren’t tested for machine compatibility during pattern development.
Recommended Solution:
Simulate the sew line using full layering and evaluate the stack thickness. Maintain bulk under 6 mm where possible, or adjust seam allowance trimming and stitch order for better machine handling.
D. Construction-Level Omissions
14. Rib-to-Body Seam Tolerance Not Defined
Typical Error:
The joining seam between the body and ribbing (e.g., hem, cuff) appears stretched, puckered, or uneven.
Why It Happens:
Ribbing and body panels are cut to spec, but no margin is included for fine-tuning stretch alignment during sewing.
Recommended Solution:
Introduce a 0.5–1 cm adjustment tolerance at the seam line for ribbing sections. This gives the sewing line some flexibility to balance visual tension and fit when attaching ribs to less elastic fabrics.

15. Hem Alignment Not Anchored to a Physical Baseline
Typical Error:
Finished garments display slanted or asymmetrical hems, especially on longer garments or flared styles.
Why It Happens:
Patterns lack a verified horizontal reference during patterning or are checked only on flat surfaces rather than hanging.
Recommended Solution:
Establish a hem alignment baseline using a reference point on the human form (e.g., side seam notches or hip line). Conduct final checks by hanging the garment to ensure drape and gravity align naturally.
Recommended SOP for Internal Pattern Reviews:
Step 1: Patternmaker Completes a Review Sheet
Each time a new pattern is created or revised, the responsible patternmaker fills out a standardized Pattern Review Sheet. This should include:
- Version number and date
- Summary of key changes
- Noted challenges or assumptions
- A checklist of the 15 common oversight points
Step 2: Cross-Functional Review Meeting (15 minutes)
Bring together the patternmaker, sample maker, and garment technician for a focused review. This brief alignment avoids misinterpretations and catches early-stage risks—especially for fast-return or short-lead items.
Step 3: Archive and Score for Traceability
The project lead or production manager files the review sheet into a shared knowledge base and scores each version based on issue count and completeness. Over time, this allows you to:
- Identify recurring blind spots
- Evaluate patternmaker consistency
- Create training content from common issues
Conclusion
Pattern making is not just a technical step—it’s a strategic function that impacts cost, lead time, and brand reputation. While many businesses invest in design, materials, and marketing, few pay equal attention to the granular details that make a pattern production-ready. These often-overlooked details—like seam direction arrows or rib stretch tolerance—can quietly cause expensive setbacks, especially when scaled across multiple SKUs.
For business-oriented teams, mastering pattern precision is a direct path to competitive advantage. It reduces sampling waste, accelerates delivery, and minimizes factory-side miscommunication. More importantly, it builds internal consistency and reliability—two assets that are essential in cross-border production and fast fashion models.
At GOPHERWOOD, we understand that precision in pattern making isn’t just craftsmanship—it’s smart manufacturing. Whether you need end-to-end development or support in upgrading your technical workflow, our team helps brands and production partners achieve efficiency without compromising fit or finish. We work with you through incoming material processing or commissioned design to ensure quality from the very first draft.